The first graders at The Rashi School worked together with their teachers and their parents to make warm winter hats which they donated to Horizons for Homeless Children.
While studying different kinds of shelters, including those for homeless people, our first graders turned knowledge into action by making winter hats for kids in need in the Boston area. “Our students knew they were making hats for a Tikkun Olam (repairing the world) project,” explains first grade teacher Mrs. Abraham. “It’s part of our curriculum and it gives our first graders a way to repair the world.”
Making warm winter hats was easy and fun! Here’s how you can make a warm winter hat of your own:
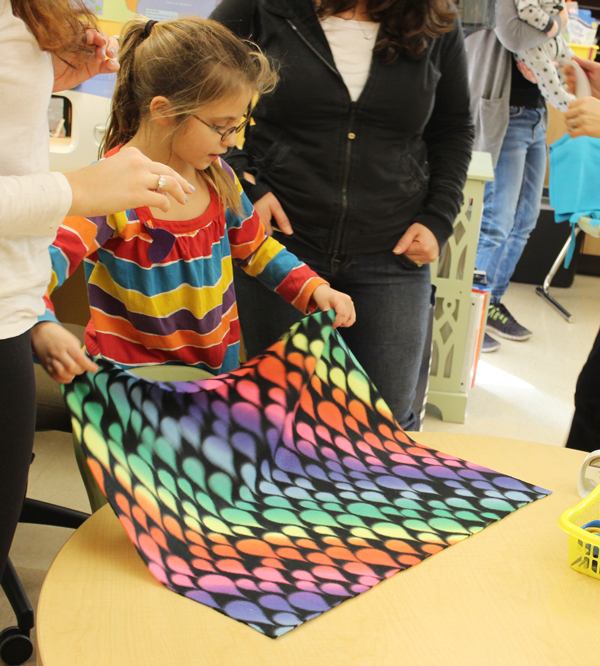
Step 1. Cut your fabric
About one square yard of fuzzy, warm fabric will do the trick.
Step 2. Fold it in half
Make sure you fold it so you end up with a rectangle, and not a triangle.
Step 3. Sew it up
After your fabric is folded into a rectangle, one side of it will be connected and the other side will have an open edge. Sew along the open edge to create a seam parallel to your folded edge.
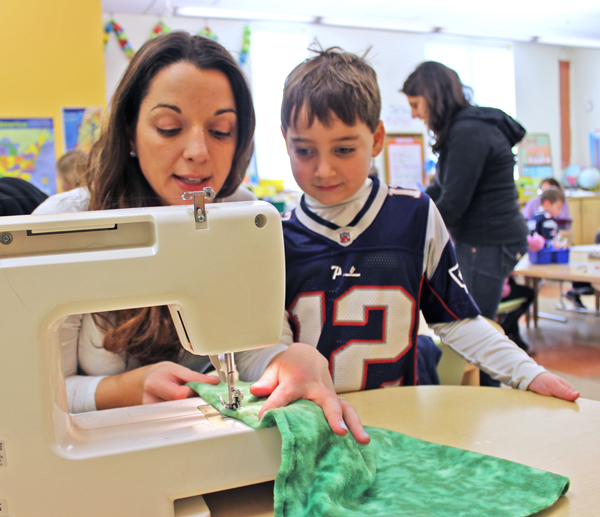
Have an adult sew together the open, long edge of your fabric.
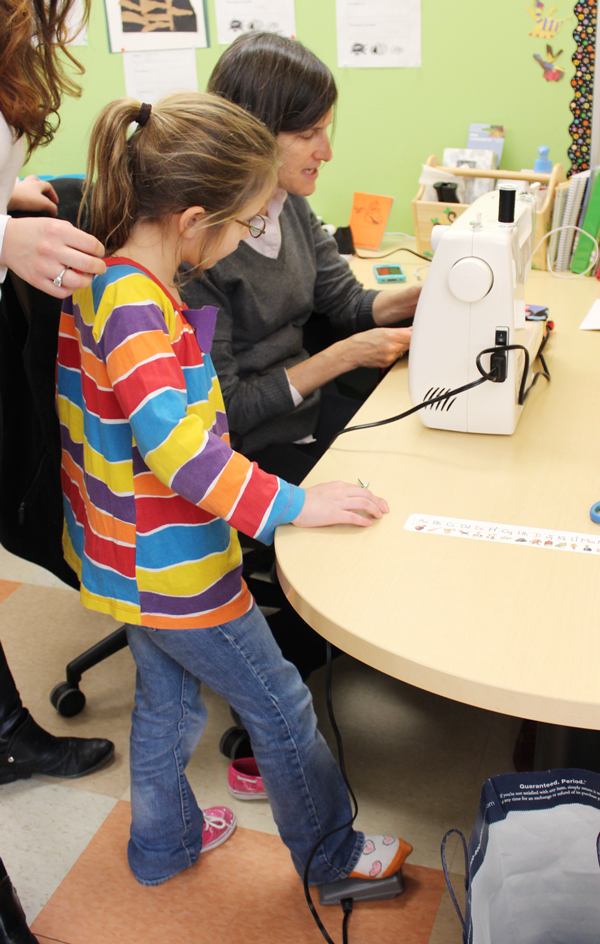
We let the student “drive” while the teacher guided the fabric through the sewing machine.
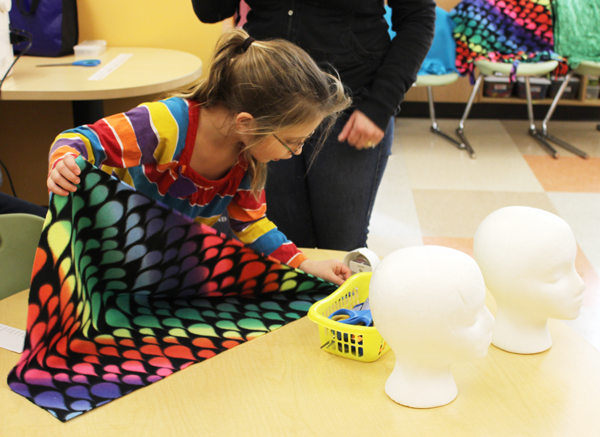
Step 4. Turn it inside out, sort-of
If you’ve sewed your hat together properly, you should have a long, cylindrical tube of fabric with a visible hem along one side. Holding the fabric vertically so it hangs long-ways in front of you, fold the top of the hat tube down over the bottom half of the hat tube, hiding your hems and creating a half-sized hat tube. Think: folding down your socks or rolling up a shirt sleeve.
When you’re done, there should be a folded edge which will serve as the brim of the hat and an unfinished edge which will become the top of the hat.
Step 5. Tie it off
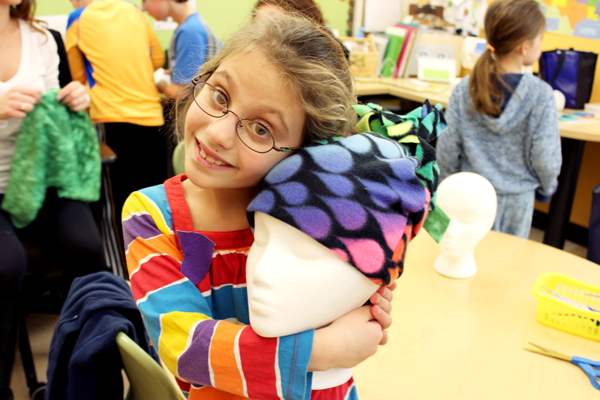
Using a head for your guide, (in our case, we used mannequin heads since we wanted to give brand new, never-been-worn hats to the kids at Horizons), bunch up the top of the hat and tie some scrap fabric around the bunch to form the hat and pompom on top.
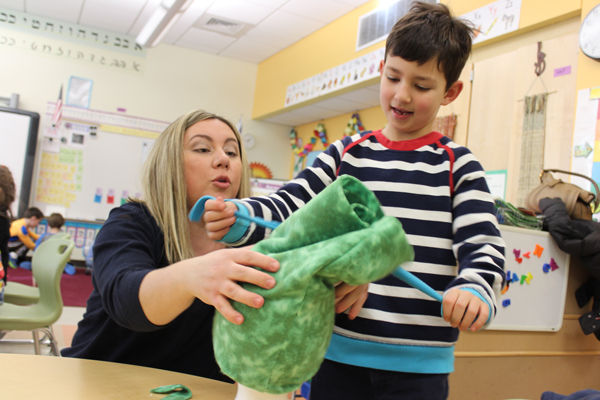
Bunch together the top of your hat…
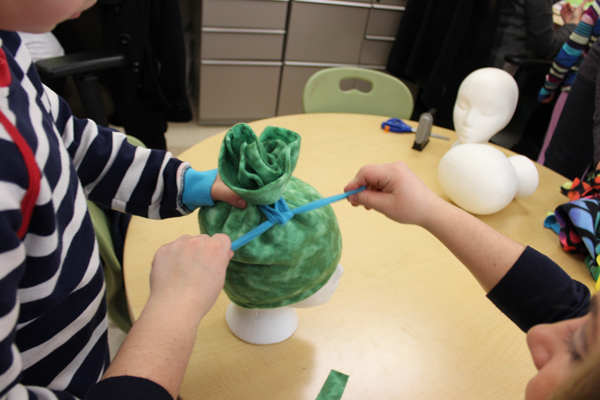
…and tie a piece of scrap fabric around it to form a hat on the bottom and the pompom on top.
Step 6. Snip some fringe
Using scissors, snip little fringes into the top section of your hat to make the tassles of a pompom.
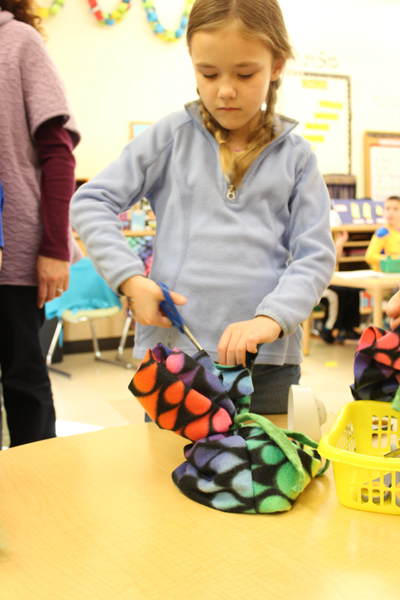
Be careful not to get your fingers!
Step 7. Enjoy your hat!
That’s it – you’re done! Enjoy your new hat, give it to someone you love, or, like we did, share it with someone in need.